
How to Install 3M Paint Protection Film
One of the best methods of protecting the paint of your car is installing 3M Paint Protection Film (PPF) to prevent scratches, stone chips, and general level of wear. Though professional installation is advisable to have the best results, good results can be attained by DIY enthusiasts who are well prepared, armed with the necessary tools, and with due care.
We, stealthwindhshieldrepairs.com, are here to let you know how to install 3M paint protection film!
Supplies and Equipment to Install 3M Paint Protection Film
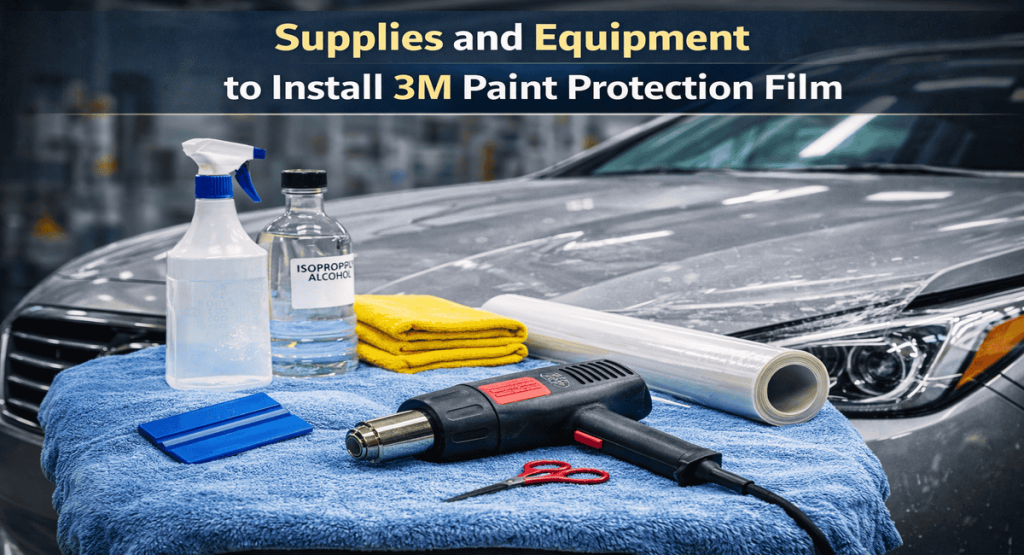
Prepare early. Make sure that you have all the necessary tools and materials to make the installation a smooth one:
3M Paint Protection Film – Pre-Cut or bulk roll.
Spray Bottle – Contained a slip solution (water and some drops of soap)
Squeegee – Soft felt-edged to prevent scratches.
Heat Gun or Hair Dryer – To shape the film to curves.
Microfiber Cloths – To clean and dry surfaces.
Isopropyl Alcohol – Final surface preparation.
Using the right tools is similar to preparing surfaces before fixing a small chip in your windshield—clean preparation directly affects durability and results.
Step-by-Step Process of How to Install 3M Paint Protection Film
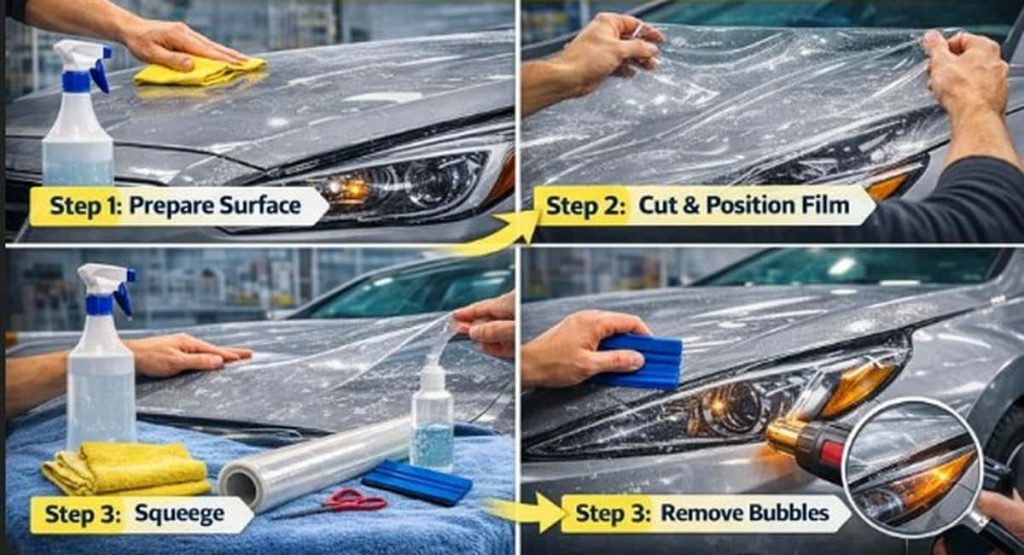
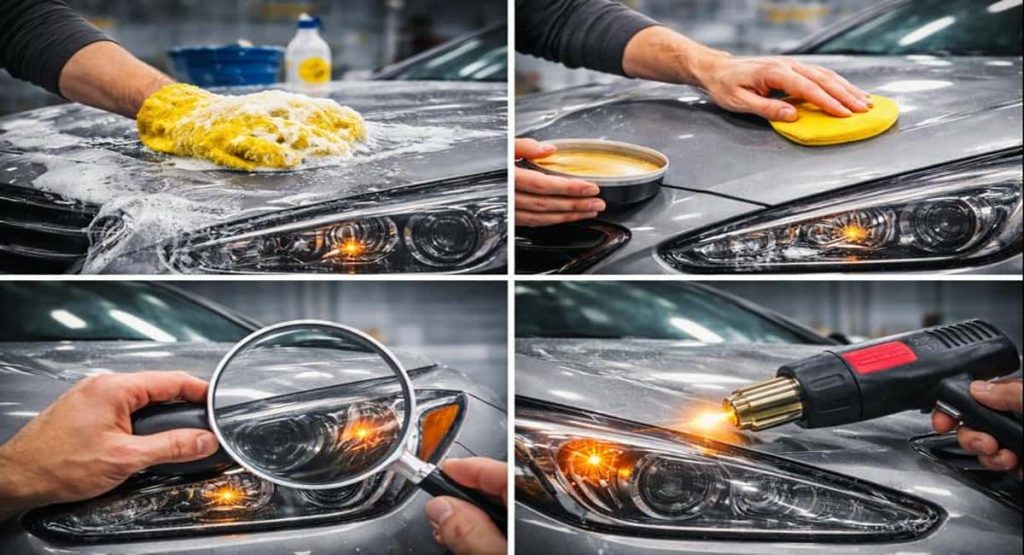
Step 1: Prepare Your Car Surface
Preparation of the surfaces is key to the successful installation of 3M Paint Protection Film:
- Clean your vehicle in order to get rid of dirt and debris.
- Towel completely dry with microfiber towels.
- Take off all the wax or polish with isopropyl alcohol.
- Check the paint and remove shallow scratches.
A clean and smooth surface would make the adhesive adhere properly and avoid dirt that could be stuck under the film.
Skipping preparation can lead to trapped debris, bubbling, and lifting—issues commonly seen when maintenance steps are ignored, similar to problems outlined in mistakes to avoid after a windshield replacement in Calgary.
Step 2: Film Cutting and Positioning
When the panel is pre-cut, position the PPF over the panel. If using a bulk roll:
- Cut and measure the film a little bigger than the area.
- Spray over the slip solution on the paint and the adhesive side of the film.
- Slip the film onto the panel, making sure that it fully covers the target.
The slip solution enables one to reposition the film before adhesion.
Step 3: Wipe Off Bubbles and Water
Once the film is positioned:
- Squeegee to remove any air bubbles and surplus solution.
- Beginning at the center, move to the edges.
- Handle the film kindly so as not to stretch or tear it.
Squeegeeing, when done properly, will result in a smooth and bubble-free finish that will not lift edges in later applications.
Proper pressure control here mirrors the technique used in chipped windshield repair: home vs professional, where uneven force can weaken long-term performance.
Step 4: Wrap Edges and Curves
Heat conformability of 3M PPF can be done in curves:
- Heat the film with a heat gun or hair dryer.
- Turn and fold around curves and fold down the sides.
- Do not overheat; this may distort or burn the film.
This is taken so that there is smooth finishing along the bumpers, mirrors, and edges.
Step 5: Final Inspection and Drying
After installation:
- Look for bubbles or flaws that are trapped. Small bubbles can dissipate in 24-48hours.
- Allow the car to rest for 24 hours so that the adhesive will be dry.
- Washing or waxing the vehicle during this curing time is not advisable.
Correct curing also guarantees protection and a clean finish. Proper curing ensures long-lasting protection, much like allowing sufficient bonding time after windshield repair service.
How to be a Successful Installer?
- Always do work in a dusty, shaded place.
- Apply a lot of slip solution to readjust.
- Always be patient. Never install in a rush
- Have microfiber cloths to wipe up the surplus solution.
- The film should never be stretched to the extreme because that leads to lifting.
All these tips will help to build the success of the DIY PPF installation and preserve the professional look of your car.
Common Mistakes to Avoid While Installing 3M Paint Protection Film
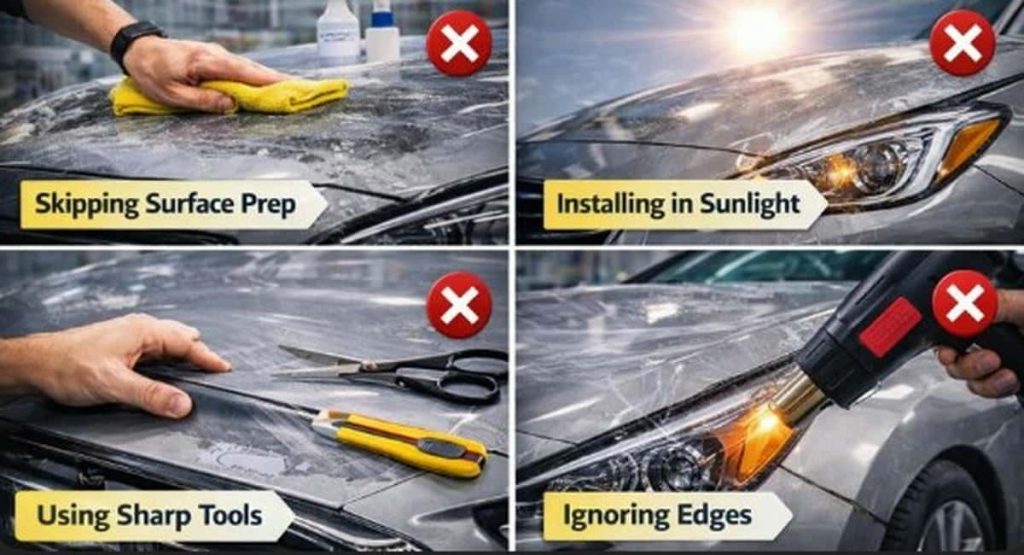
Moving past surface prep- Forms bubbles due to dirt and oils.
Use of film in direct sunlight- The adhesive could dry too quickly.
Sharp tools- Scratch both film and paint.
Neglecting Edges- Results in peeling.
Haste in the drying- Undermines adhesion.
Knowing these errors will allow any mistake to be avoided at an expensive cost, and the installation will last.
These mistakes can shorten film lifespan and reduce protection—similar to ignoring routine care outlined in maintain your windshield after repair.
When to Use Professional Help for Installing 3M Paint Protection Film
Although one can install the system himself, professional installers have:
- Cleanroom environments
- Special methods and equipment.
- Ready-made patterns of a perfect fit
- Knowledge of complicated curves and panels
For full-vehicle PPF or high-value cars, professional installation is often the safer choice—just as experts are recommended when deciding when to replace your windshield.
Tips on the Maintenance of 3M Paint Protection Film Once Installed
It is important to maintain 3M Paint Protection Film properly to make it long-lasting and in order to keep your car paint covered. Follow these tips:
- Wait Before Washing – Before washing your car after installation, wait 24-48 hours to ensure that the adhesive is completely dry.
- Light Cleaning – Clean the dirt and grime with soft microfiber cloths and light car wash soap. Do not use rough brushes or sponges.
- Never Use Harsh Chemicals – It is advisable to avoid harsh solvents or acidic chemicals, which may break the adhesive or ruin the film.
- Wax Carefully – Waxing is not prohibited; however, it must be done with products that do not affect the paint protection film and thus remain clear and stick.
- Check periodically – Look at sides raised, debris or bubbles. Small bubbles tend to correct themselves; however, edges raised should not be left raised.
- Self-Healing Properties – Light heat from a heat gun or even sunlight can heal minor scratches on high-quality 3M PPF.
- Keep Dry and Clean – Do not keep the film exposed to high temperatures or rough surfaces that will ruin the film.
Routine inspection ensures long-term performance, similar to seasonal checks recommended in how to protect your car from hail damage in Calgary.
Conclusion
One of the best methods of protecting your vehicle’s paint is installing 3M Paint Protection Film (PPF) to prevent scratches, stone chips, and general wear. This type of exterior protection works best when combined with overall vehicle care, including clear visibility and structural safety, which is why professional Windshield Repair in Calgary plays an important role in safe driving.
Although DIY installation may cost less, achieving a bubble-free finish requires thorough preparation, the right tools, and plenty of patience—and even then, the result isn’t guaranteed. Make sure that you are following all the steps precisely. A simple blunder can cost a lot!
Hopefully, you understood how to install 3M paint protection film!