
How to Polish Your Headlights at Home – Headlight Restoration
Headlights in a car serve a vital role in keeping you safe while you drive your car. So you know that you must always keep your headlights looking clean and polished. While we do recommend that you have your headlights polished by professionals, you can do it at home if you want to save money.
Today, we will discuss how you can polish your headlights at home easily and with simple materials and tools. These headlights tend to get foggy and dirty the more kilos you put in, so keep an eye out for their conditions.
Why Should You Polish Your Headlights at Home?
Before we show you how to polish your headlights at home, you need to know why you should polish them in the first place. Aside from letting you see the roads clearly at night and during bad weather, there are other reasons to keep your car’s headlights clear. Here are just a few to help you better understand the need:
Visibility
As we said, one of the main reasons to have polished headlights is because it offers more clarity. This becomes especially important when you are driving at night or through bad weather. The polished headlights will let you see further down the road and reduce the chances of accidents.
Enhanced Safety
Connected with the first point, polished headlights drastically reduce the chances of accidents with other obstacles, such as cars and objects. You need clear headlights during dusk, dawn, or inclement weather when visibility is compromised.
Cost-Effectiveness
If you polish your headlights at home, then you can save money by not having to go to a professional. This is ironic since we are those headlight restoration profesisonals. DIY kits and materials are readily available and relatively inexpensive, saving you money in the long run.
Aesthetic Appeal
Cars mean many things to many people, but one thing is clear (pun intended): they are nice to look at. Foggy or dirty headlights aren’t nice to look at. So po, listing them at home or the shop enhances the aesthetic appeal of your car.
Convenience
Like saving money, you also save time by polishing your headlights at home. You don’t need to schedule appointments or visit a professional. You can go at this task whenever it fits into your schedule.
Prolonged Headlight Lifespan
Regular maintenance, including polishing, can increase the lifespan of your headlights. By removing oxidation and applying protective sealants, you can stop premature wear and tear, thus saving you from costly replacements.
Learn More: How Much Should Headlight Restoration Cost in Canada?
Things You Need To Polish Your Headlights at Home
Now, we are getting to the good parts. The first step to polishing your home headlights would be gathering what you need. Here is a list of what you require to do this DIY project:
Headlight Restoration Kit
One of the first things you will need is a headlight restoration kit. This kit will have a polishing compound, sandpaper or polishing pads, and protective sealant. The kits are made for removing oxidation and restoring clarity to headlights.
Masking Tape
Another important tool for polishing headlights at home is masking tape. It protects the surrounding areas of the headlights from accidental damage during polishing. The tapes ensure that only the headlights are treated. They prevent any unwanted scratches or marks on the vehicle’s paintwork.
Microfiber Towels
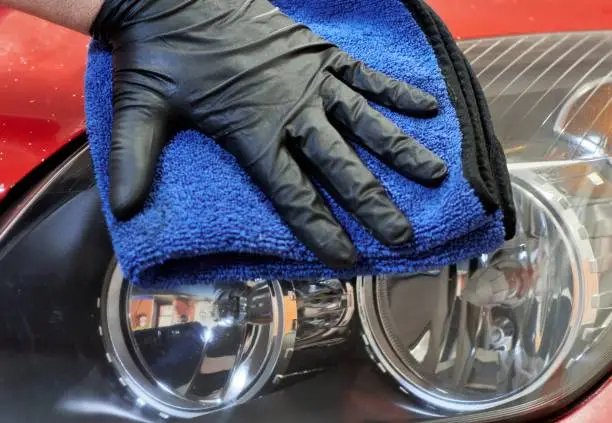
Microfiber towels are gentle yet effective for wiping off any excess polishing compound and cleaning the headlights. The towels ensure a smooth and streak-free finish without scratching the headlight surface.
Water
Water is used for rinsing off the headlights after polishing to remove any remaining residue or debris. It’s essential for achieving a clean and clear finish.
Car Wash Soap
Car wash soap cleans the headlights before the polishing process begins. It helps with removing dirt, grime, and other contaminants that may interfere with the polishing compound’s effectiveness.
Protective Eyewear
We highly recommend getting some protective eyewear before polishing any headlights. You will be working with compounds that can splash or release fumes, so these eyewear are a must. Safety should always be a priority when working with chemicals or materials.
How to Polish Your Headlights at Home?
Finally, we are ready to go over how to polish headlights at home by yourself. There are seven steps, but you might have additional ones because of the car you drive. So here are the seven basic steps to polishing headlights at home:
Gather The Right Items
Begin by gathering all the necessary materials we mentioned above. Ensure that your vehicle is parked in a well-lit and ventilated area before starting the process.
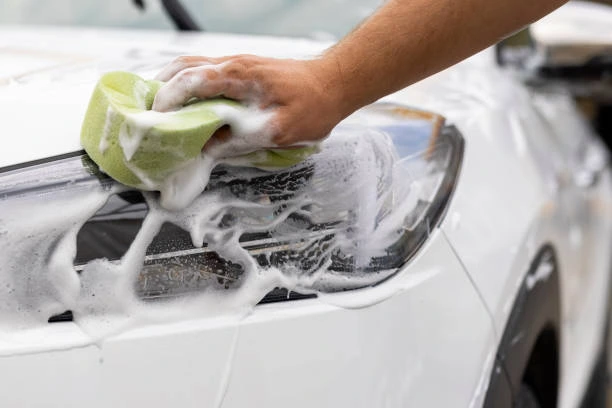
Cleaning the Headlights
Start by washing the headlights with water and car wash soap to remove any surface dirt or grime. Use a microfiber towel to dry the headlights thoroughly before moving to step three.
Taping Off Surrounding Areas
Use masking tape for covering the surrounding areas of the headlights. By area, we mean the paintwork and adjacent panels. This is to protect them from accidental damage during the polishing process.
Applying Polishing Compound
Apply a small amount of the polishing compound from the headlight restoration kit onto a clean microfiber cloth. Gently rub the compound onto the headlight surface using round motions. We suggest you work in small sections at a time. This will take time but give you the optimal result.
Polishing Process
Continue to polish the headlights with the compound until the oxidation disappears. Use more pressure as you work to ensure complete removal. You might have to do several passes to achieve the desired results. Stay patient and thorough as you work.
Rinsing Off Excess Compound
After you have polished your headlight, rinse the headlights with water. This is to remove any remaining residue from the polishing compound. Use another clean microfiber towel to dry them completely.
Applying Protective Sealant
Finally, apply a layer of protective sealant from the headlight restoration kit. For this step, use another microfiber towel. The sealant helps to protect the headlights from future oxidation and keeps the clarity of the surface.
Mistakes To Avoid While You Polish Your Headlights at Home
As we said before, polishing your headlights at home has many benefits. However, there are also chances that you do something wrong. We discuss the most common mistakes here to ensure you don’t make any mistakes.
Not Getting The Right Materials
One of the major and common mistakes we hear people making is not getting the right tools and materials. In fact, we have heard many people trying this project with alternatives like dish soap instead of car soap. Not getting these simple items can greatly impact your final results.
Using Incorrect Techniques
We haven’t gone over any unusual or difficult techniques for this project; therefore, you shouldn’t follow them. If you are a car expert, then you could do things differently, but if you are a beginner, please follow our guide to the letter.
Using the wrong techniques or doing this your way may result in subpar results and potential damage to the headlights. For example, avoid applying too much pressure or using abrasive materials that could scratch or haze the headlight surface.
Failing to Rinse Thoroughly
Rinsing is an important part, which is why it’s a completely separate step in our guide. Not rinsing will leave behind excess residue, thus affecting the clarity and longevity of the results.
Skipping Protective Sealant
Never skip putting on protective sealant after polishing your headlights at home or the shop. The sealant is there to protect your headlights from future oxidation and deterioration.
It helps to maintain the clarity and brightness of your headlights for longer periods.
Read which is the best option in the debate of headlight restoration vs. replacement from us.
Conclusion
Headlights are a vital part of your car that keeps you and your friends or family safe when you are out on the road. But with use and time, these headlights can get foggy and dirty, which is why you need to polish them.
While going for a professional restoration service is a good idea, doing it at home is also possible. Our guide on how to polish your headlights at home should be enough to ensure your headlights stay clean and clear for a long time.
To give your headlights the best cleaning, make sure you don’t fall into the common pitfalls others have. Gather the right things and take your time to give your headlights a new lease on life with our help.
FAQ’s
Q. What causes headlights to become cloudy?
Headlight oxidation, caused by UV exposure and environmental pollutants, leads to cloudiness over time.
Q. Can I use toothpaste to polish my headlights?
Toothpaste can be used as a makeshift polishing compound, but dedicated headlight restoration kits offer better results.
Q. How often should I polish my headlights?
It’s recommended to polish headlights as needed, typically every few months, depending on environmental conditions and driving habits.
Q. Is it safe to drive with oxidized headlights?
Oxidized headlights reduce visibility and can be hazardous, especially in low-light conditions or inclement weather.
Q. Can I use household cleaners for headlight cleaning?
It’s best to use products specifically designed for automotive use, as household cleaners may contain ingredients that could damage the headlights.