
How to Repair a Tire Puncture at Home | DIY Flat Tire Guide
It can ruin your day to have a flat tire, especially if it is in the middle of a trip or when you are in a hurry. But here’s the good news — a lot of punctures can be fixed quite easily at home, with the right gear and some patience. You don’t always need to zip straight to the mechanic.
This guide will teach you how to fix a flat tire at home — step by step — and show you which tools will ensure that your repair job is safe and done right.
When Can You Repair a Tire Yourself?
Before you even get to the fixing part, it’s crucial to inspect the state of the tire and find out if it is repairable at all. There are cases of a puncture where a home repair is not possible.
You can repair a tire if:
- The puncture is within the tread area and not along the sidewall.
- The diameter of the hole is within 6 mm (¼ inch).
- The tire isn’t too damaged or worn out.
- You can then safely pull the trash that caused the puncture from your foot.
You can’t fix a tire if:
- The sidewall gets a gash or cut.
- The hole is big, uneven, or leaking from more than one location.
- The tire is beyond its years or shows evidence of bad dry rot.
If you are on the “safe to repair” side of things, let’s do this.
Tools You’ll Need
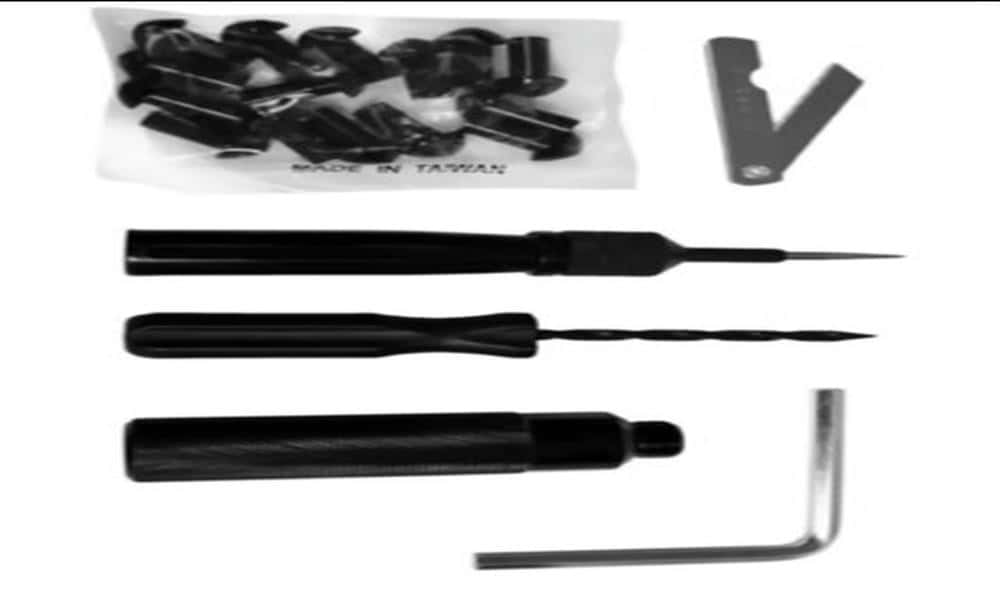
Here are the essential items you’ll need to fix a tire puncture at home:
- Valve stem, valve core, and cap, tire deflation as part of flat repair — it all includes a plugin kit.
- Tire pressure gauge. Before and after the fix, you’ll also want to check tire air pressure.
- Pliers – To pull nails, screws, or other dangerous items that are still embedded in the tire.
- Car jack and lug wrench – they are for lifting the car and taking off its tire, safely.
- Air compressor or tire inflator. Credit for the tire to be refilled once it’s repaired.
- Soapy water or spray bottle — For testing for leaks after repairing.
Optional but helpful:
- Protective gloves
- Chalk, permanent marker to ID the puncture site
You can also track post-repair inflation correctly by reading How to Check Tire Pressure at Home for long-term tire health.
Step-by-Step Guide to Repairing a Tire Puncture
Here’s a simple, practical way to fix your tire at home:
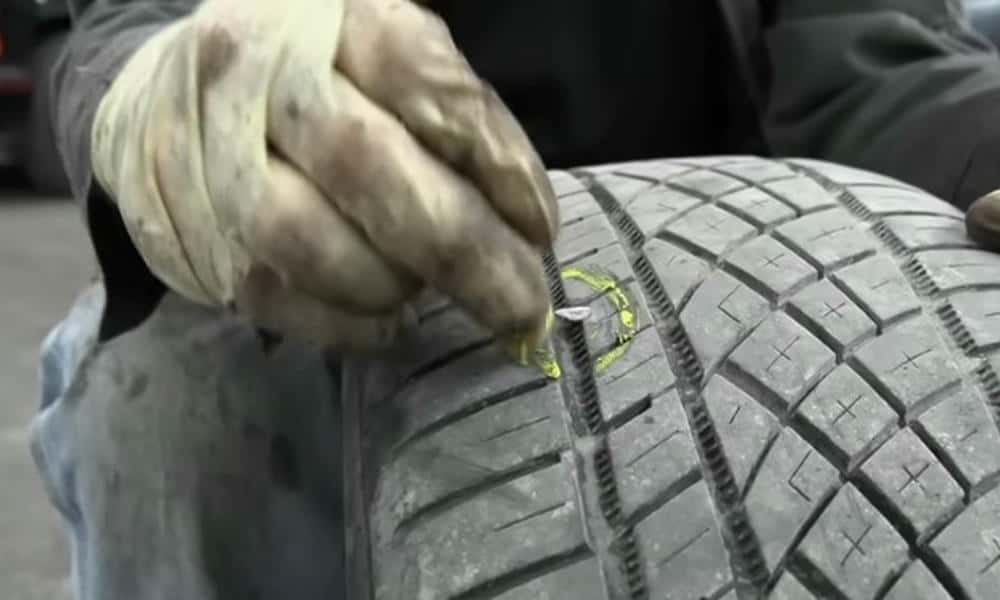
Step 1: Find the Puncture
Start the process of finding the hole by carefully looking for any exposed nails, screws, or other sharp objects that might be on the surface of your tire. If the hole is not clearly visible, add a little air back into the tire and apply some soapy water in that area. You will notice some bubbles being formed, and that’s the place where the air is leaking — your puncture. Mark the spot with chalk or any other marker.
Step 2: Remove the Object
With the help of pliers, gently pull out the nail or screw. Be careful — if you pull it too fast, the hole may enlarge or more damage may be done.
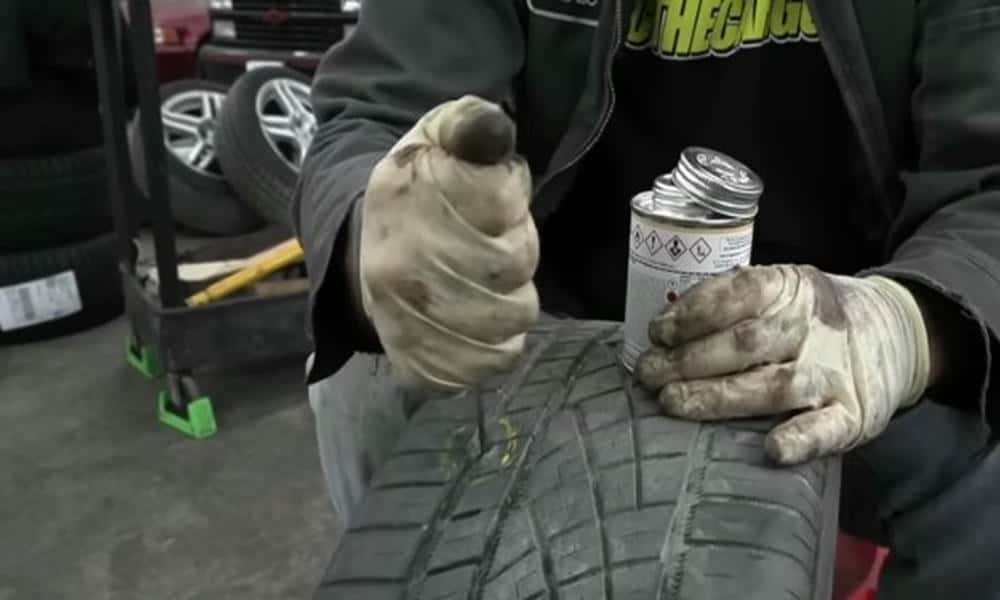
Step 3: Prepare the Hole
In your repair kit, find the rasp tool, and push it into the hole. Twist it a few times left and right to make rough edges in the puncture. This has the benefit of making the plug stick better.
This is a little irritating, but it helps ensure the plug stays firmly put.
Step 4: Insert the Plug
Now, we are going to take the threaded rubber plug and insert it through our insertion tool. Everything should evenly go down into the middle. Jam the thing into the hole until it’s two-thirds through the plug. Then, with the tool, so quickly pulled back.
The plug will remain in the tire& seal the hole. Trim off any more plug material sticking out.
Step 5: Inflate the Tire
Use an air compressor or portable tire inflator to inflate your tire to the recommended PSI (pounds per square inch) level. There should be a sticker on the side. This indicates the correct pressure setting!
Step 6: Check for Leaks
Spray some soapy water around the repaired area. If bubbles do form, air is still leaking out — you may need to reinsert the plug or take your tire into a tire shop for further investigation.
Step 7: Reinstall and Test
Reinstall the tire – If you had to remove the flat tire from your car, put on a secure wheel again with a lug wrench. Jack the car down, and take a short drive around to ensure that air pressure hasn’t varied. (Also read-Tire Installation at Canadian Tire: Pricing, Process, and What to Expect)
If your tire keeps losing air after multiple attempts, review the expected Flat Tire Repair Cost to decide whether professional service is a better option.
Safety Tips
- Always park on a flat, stable surface before working.
- Never repair a tire that has been driven flat for a long time – the internal construction may have been damaged.
- And remember: This is only a temporary fix, not for the life of your tire. It can hold for weeks, but consult a tire technician quickly for a proper patch from the inside.
Road debris that punctures tires is also one of the biggest causes of windshield chips and cracks. If you notice a small glass chip after driving on gravel roads, don’t ignore it—learn about Fixing a Small Chip in Your Windshield before it spreads.
Driving with a damaged windshield can even be illegal in some cases. Read: Is It Illegal to Drive With a Cracked Windshield?
Why Choose Stealth Windshield Repair
At Stealth Windshield Repair, we understand the value of safety and security when you are driving.
We’ve got years of experience fixing windshields and auto glass. We also want to help drivers make smarter, safer choices on the road when it comes to getting their ride in good shape.
Here’s Why Our Customers Trust Us:
- Quick and Friendly Service: In less than 30 minutes, we repair most windshield chips and cracks.
- Pricing: Good service shouldn’t cost an arm and a leg, so we keep our prices to a minimum.
- Trained Technicians: Our employees receive training to work on all makes and models of vehicles, from crew cars to your personal automobile.
- Honest service is No Additional Fees: With us, the price you see is the price you pay – no add-ons or extra fees.
- Canadian Prowess: We know the condition of local roads, from harsh winters to gravel roads, and how that affects your car’s glass (and its tires).
If your windshield damage is beyond DIY solutions, find out When to Replace Your Windshield before it becomes a safety risk.
Final Thoughts
Home tire repair is easier than it sounds. It can help you out in terms of time, money, and less emergency stress. Also, if you always keep a tire plug kit and an air compressor in your vehicle, those extra patches could help you anytime!
And when you do, remember, Stealth Windshield Repair is here to carefully perform your windshield auto glass maintenance!